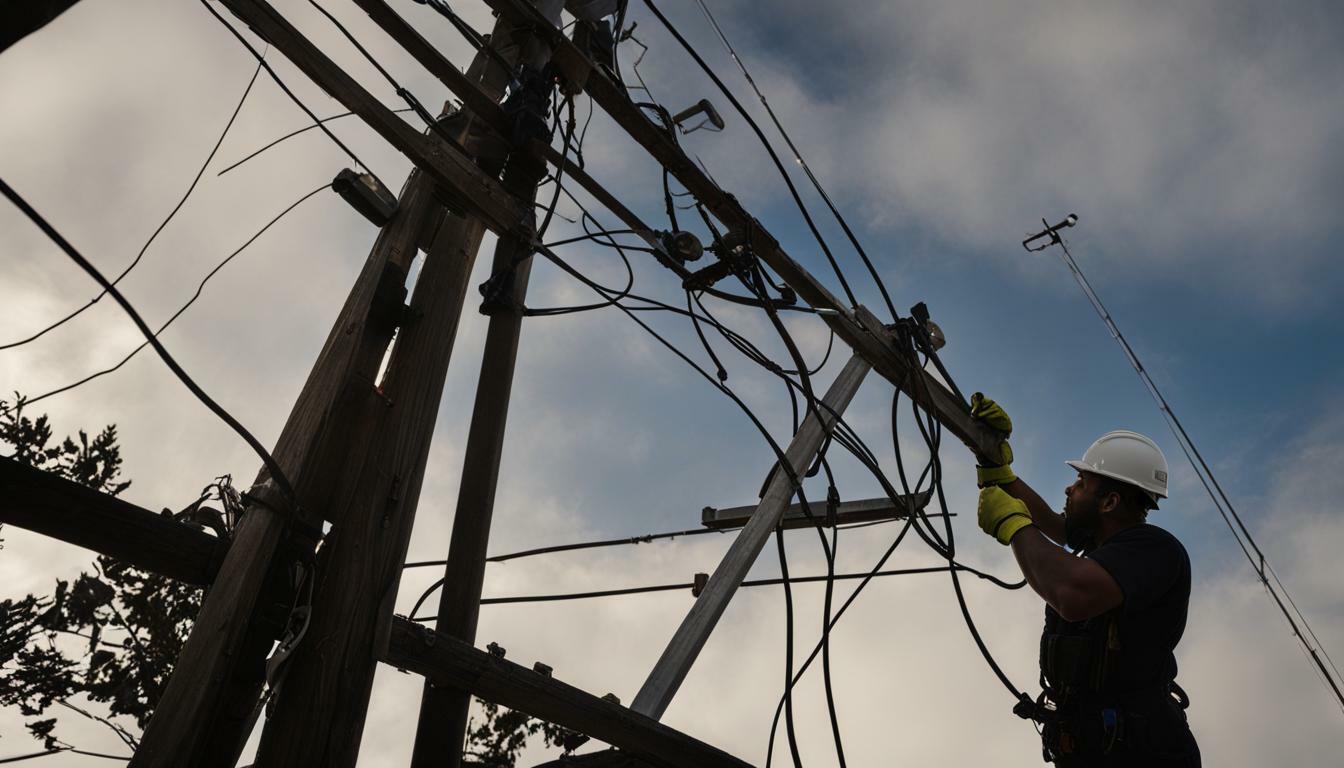
Are you experiencing connectivity issues with your outside internet cable? Perhaps you’ve noticed some damage to the cable and need to make repairs. No need to worry – I will walk you through the steps to fix any issues with your outside internet cable in this guide.
First, it’s important to troubleshoot the issue to identify the root cause. In the next section, we’ll cover common problems with outdoor internet cables and how to troubleshoot them.
Once you’ve identified the issue, it’s time to proceed with the necessary repairs. This may involve fixing cuts, breaks, or loose connections in the cable. The following sections provide detailed instructions on repairing your outdoor internet cable.
If you’re a DIY enthusiast, we’ve got you covered too. In section four, we’ll discuss how to handle the repairs yourself and save on professional service costs.
Post Contents
- 1 How to Fix Outside Internet Cable?
- 2 Troubleshooting Outdoor Internet Cable
- 3 Outdoor Internet Cable Repair
- 4 DIY Outside Internet Cable Repair
- 5 Outdoor Ethernet Cable Troubleshooting
- 6 Repairing Underground Internet Cable
- 7 Outdoor Network Cable Fix
- 8 Fixing Internet Cable in the Ground
- 9 Outdoor Internet Cable Problem Solving
- 10 Maintaining a Smooth Outdoor Internet Connection
- 11 Conclusion
- 12 FAQ
- 12.1 How do I fix my outside internet cable?
- 12.2 How do I troubleshoot outdoor internet cable?
- 12.3 How can I repair my outdoor internet cable?
- 12.4 Can I repair my outside internet cable myself?
- 12.5 What are standard troubleshooting techniques for outdoor Ethernet cables?
- 12.6 How do I repair an underground internet cable?
- 12.7 How can I fix outdoor network cable issues?
- 12.8 How can I fix an internet cable buried in the ground?
- 12.9 How can I solve less common outdoor internet cable issues?
- 12.10 How can I maintain a smooth outdoor internet connection?
How to Fix Outside Internet Cable?
Remember that outdoor Ethernet cables and underground internet cables pose unique challenges in repair. Sections five and six will cover troubleshooting and repair tips for these cables.
Once your cable is fixed, it’s essential to maintain a reliable connection. Section ten will provide tips and advice on maintaining a smooth outdoor internet connection.
By following the steps outlined in this guide, you can easily troubleshoot, repair, and maintain your outside internet cable. Let’s get started!
Troubleshooting Outdoor Internet Cable
As a professional copywriting journalist, I understand the frustration of connectivity problems and damaged cables with outdoor internet connections. Before attempting any repairs, it’s essential to identify the root cause of the problem. Here are the steps for troubleshooting outdoor internet cable:
- Check your modem and router: Ensure they are powered on and connected correctly.
- Inspect the cable: Look for any visible signs of damage, such as cuts or breaks.
- Restart your devices: Try restarting your modem and router to see if it resolves the issue.
- Check for outages: Check with your internet service provider (ISP) to see any known outages in your area.
- Run a speed test: Use an online speed testing tool to check if your internet speeds are slower than expected.
- Reset your connection: If all else fails, try resetting your modem and router by unplugging them for 30 seconds and then plugging them back in.
Following these troubleshooting steps, you can eliminate any simple fixes before moving on to more complex repairs for outdoor internet cable issues.
Outdoor Internet Cable Repair
If you’ve identified an issue with your outdoor internet cable, the next step is to proceed with the necessary repairs. Here, I’ll guide you through repairing common cable problems, such as cuts, breaks, or loose connections.
Step 1: Assess the Damage
Before you begin any repairs, it’s essential to assess the extent of the damage to your outdoor internet cable. Check for any visible cuts, breaks, or areas where the cable may have pulled loose from its connectors.
Use your hands to gently tug the cable and see if it moves or feels loose. If you cannot identify the issue, it may be necessary to use a multimeter to test the cable for continuity.
Step 2: Gather the Necessary Tools
Once you’ve identified the issue with your outdoor internet cable, it’s time to gather the necessary tools to proceed with the repair. Here are some items you may need:
- Cable cutter or stripper
- Crimping tool
- Electrical tape
- Heat shrink tubing
- Wire nuts
- Multimeter (if necessary)
Step 3: Cut and Strip the Cable
If your cable has been cut or damaged, you’ll need to remove the damaged section and strip the ends of the remaining cables. Use a cable cutter or stripper to remove the outer insulation, being careful not to cut into the wires inside.
Step 4: Connect the Wires
Once you’ve stripped the ends of the cable, connect the wires according to the color-coded diagram provided by your cable manufacturer.
Step 5: Insulate the Connection
After you’ve connected the wires, wrap them with electrical tape to insulate them and protect them against moisture and dust. If you need added protection, you can also use heat shrink tubing to cover the connection.
If you’ve repaired a section of cable exposed to the elements, it’s a good idea to wrap the entire area in electrical tape or use a waterproof sealant to protect the connection from rain, snow, and other environmental factors.
Now that you’ve repaired your outdoor internet cable, it’s time to test your connection and ensure it works correctly. If you’re still experiencing issues, calling a professional for further assistance may be necessary.
DIY Outside Internet Cable Repair
If you’re a handy person who likes to take on DIY projects, you can repair your outside internet cable and save on professional service costs. Here are some tips and instructions to get you started:

1. Gather the necessary tools
You’ll need a few tools to repair your outside internet cable. These include:
- Wire cutters/strippers
- Crimping tool
- Waterproof heat shrink tubing
- Electrical tape
- Pliers
- Continuity tester
2. Identify the problem
Before you can fix your outside internet cable, you need to identify the problem.
Use a continuity tester to check for breaks or cuts in the cable. Check the connectors for corrosion or loose connections if the cable is not broken.
3. Splice the cable
If you’ve identified a break or cut in the cable, you must splice it back together.
Strip the damaged ends of the cable using wire cutters/strippers, then splice the wires back together by twisting them tightly. Use a crimping tool to secure the connection. Cover the spliced area with waterproof heat shrink tubing and apply heat to seal it with a heat gun.
4. Fixing connectors
If the issue is with the connectors, you’ll need to repair or replace them.
Remove the damaged connector using pliers. Strip the wires, insert them into a new connector, and then secure them with a crimping tool. Cover the connector with waterproof heat shrink tubing and seal with a heat gun.
5. Waterproofing the cable
It’s important to waterproof the area where you’ve made any repairs to prevent further damage.
Wrap the repaired area with electrical tape, then cover it with waterproof heat shrink tubing. Apply heat with a heat gun to seal the tubing in place.
Following these steps, you can successfully repair your outside internet cable and restore your internet connection.
Outdoor Ethernet Cable Troubleshooting
If you’re experiencing problems with your outdoor Ethernet cable, there are a few steps you can take to troubleshoot the issue. Following these simple solutions, you can quickly identify and resolve problems with your outdoor Ethernet cable.
Step 1: Check the Connections
The first step in troubleshooting outdoor Ethernet cable problems is to check the connections. Ensure the cable is securely connected to both the device and the router. Loose connections can cause disruptions in the signal, resulting in slow internet speeds or dropped connections.
Step 2: Test the Cable
If checking the connections doesn’t solve the problem, the next step is to test the cable. You can use a cable tester to check the cable for possible defects. Alternatively, you can try using a different Ethernet cable to see if that solves the issue.
Step 3: Check for Signal Interference
Outdoor Ethernet cables can be susceptible to interference from other electronics, such as wireless routers, cordless phones, and microwaves. Ensure your Ethernet cable is not placed near any other electronic devices that could cause signal interference. Try moving the cable to a different location to see if that solves the issue.
Step 4: Use a Surge Protector
Outdoor Ethernet cables can also be damaged by power surges caused by lightning strikes or other electrical issues. A surge protector can help protect the cable from these types of damage.
Step 5: Check for Weather Damage
Finally, outdoor Ethernet cables can also be damaged by exposure to extreme weather conditions. Check the cable for any signs of damage, such as frayed wires or cracks in the insulation. If you suspect weather damage, replacing the cable is best to ensure a reliable connection.
Following these troubleshooting steps, you should be able to identify and resolve any issues with your outdoor Ethernet cable. If you’re still experiencing problems, it may be necessary to seek professional assistance.
Repairing Underground Internet Cable
When it comes to repairing underground internet cables, there are a few extra challenges to consider. The first step in fixing the cable is to locate it. This can be done using a cable locator tool or digging along the cable’s expected path.
Once the cable is located, you must dig a hole around the damaged area. This can be done using a shovel or a trenching machine, depending on the size of the area. Make sure to dig carefully to avoid causing further damage to the cable or any other underground utilities.
| Tools and Materials Needed: | Instructions: |
|---|---|
| Splice enclosure | 1. Open the splice enclosure and place the damaged cable inside. |
| Splicing kit | 2. Use the splicing kit to connect the ends of the damaged cable to a new section of cable. |
| Heat shrink tubing | 3. Cover the spliced area with heat shrink tubing to protect it from moisture. |
After exposing the damaged area, you must splice the cable back together. This can be done using a splice enclosure and a splicing kit. Once the cable is spliced together, cover the spliced area with heat shrink tubing to protect it from moisture and other environmental factors.
Finally, replace the soil and ensure the cable is securely fixed. It’s a good idea to test the connection before completely filling the hole to ensure the repair was successful.
Repairing an underground internet cable can be complex, so hiring a professional is always a good idea if you’re unsure what to do. Remember to take all necessary safety precautions and follow all local regulations when digging or repairing underground utilities.
Outdoor Network Cable Fix
Outdoor network cables are a vital component of a stable outdoor internet connection. However, like any other outdoor cable, they are susceptible to damage from environmental factors or wear and tear. In this section, I will guide you through some common issues with outdoor network cables and how to fix them.
1. Identifying the Problem
The first step in fixing your outdoor network cable is identifying the problem. Check all the connectors and cables for any visible damage or wear. You may need to replace the connector or cable if there is physical damage.
If the damage is not visible, the problem may lie in the wiring or grounding. Use a tester to check if there is a continuity issue or any short circuits.
2. Replacing Connectors
If your connections are damaged, you may need to replace them. Cut the cable at the damaged point, leaving enough length to reattach a new connector. Strip the ends of the cable, and connect it to the new connector following the manufacturer’s instructions.
3. Wiring Problems
Wiring problems can be tricky to identify but can cause connectivity issues. Test each cable for continuity using a tester and identify any breaks or short circuits. If you find any problems, cut the affected cable and splice it into a new section. Be sure to use waterproofing techniques to protect the splice from moisture.
4. Grounding Issues
Proper grounding is essential for outdoor network cables. If your cable is not grounded correctly, it can cause connectivity issues or damage your equipment. Ensure that the grounding wire is connected to a proper grounding point and that there is no damage to the wire itself. If there is damage to the grounding wire, replace it immediately.
Following these steps, you can troubleshoot and fix common issues with outdoor network cables and restore your internet connection. Always take precautions when working with electricity and outdoor cables to ensure safety.
Fixing Internet Cable in the Ground
If your internet cable is buried underground or installed in the ground, it can be challenging to access and repair. However, you can fix the cable and restore your internet connection with the right tools and techniques. Here’s what you need to do:
- Locate the cable: The first step is identifying where the cable is buried. You can use a cable tracer or toner to locate the cable underground. Alternatively, a metal detector can find metal conduits or pipes carrying the cable.
- Check for damages: Once you’ve located the cable, inspect it for any damages. You must replace the damaged section if the cable is cut or broken. Check for any loose connections or corroded wiring if the cable is intact.
- Prepare for repairs: Ensure you have all the necessary tools and equipment before repairing the cable. You’ll need a cable tester, wire cutter/stripper, waterproof tape, and connectors. You may also need digging tools to access the cable underground.
- Repair the cable: If it is damaged, you must cut out the damaged section and replace it with a new one. Strip the wires on both ends of the cut and attach the connectors. Once you’ve connected the new section, use waterproof tape to seal the connection and protect it from moisture.
- Test the connection: Once you’ve completed the repairs, use the cable tester to check the integrity of the connection. Make sure that you’re getting a strong signal and that there are no dropouts. If there are any issues, repeat the repair process until you have a solid connection.
Repairing an internet cable on the ground can be time-consuming and challenging. However, following these steps and taking the necessary precautions, you can fix the cable and restore your internet connection.
Outdoor Internet Cable Problem Solving
While many outdoor internet cable issues can be resolved through simple troubleshooting and DIY repairs, sometimes the problem may not be easy to identify. In this section, I will provide some problem-solving strategies to help you resolve any lingering issues with your outdoor internet cable.
1. Check for Environmental Factors
One common issue with outdoor internet cables is environmental factors like weather or animals. If your cable is exposed to harsh weather conditions like heavy rain, snow, or extreme heat, it may cause a connection problem. It’s also possible that animals like squirrels or rats may have damaged your cable. In such cases, you may need to replace the affected part of the cable or consider rerouting the cable for protection.
2. Inspect Your Equipment
If you’ve ruled out environmental factors, your equipment is following to check. Ensure your modem or any other devices connected to the internet cable are working correctly. Check if the cables are securely connected and if there are any visible signs of damage or loose connections. Rebooting your modem and other network devices may also help resolve the problem.
3. Scan for Viruses and Malware
If you suspect your internet cable problem may be due to a virus or malware infection, scan your computer for these issues. Malware can affect your internet connection and cause connectivity problems. Running a malware scan can help detect and remove these threats, restoring your internet connection stability.
4. Reach Out to Your Service Provider
If none of the above solutions work, the problem may be on your service provider’s end. Contact your provider’s customer support team and describe the issue in detail. They may be able to diagnose the issue and provide a solution or even schedule a technician to come to your property and assess the problem in person.
By following these outdoor internet cable problem-solving strategies, you can effectively identify and resolve any issues with your cable, ensuring a dependable and consistent internet connection.
Maintaining a Smooth Outdoor Internet Connection
Now that you’ve successfully fixed your outside internet cable and resolved any connection issues, it’s essential to maintain a smooth and reliable connection. Following the tips below can prevent future problems and ensure a consistent internet experience.
1. Protect Your Cable
Outdoor internet cables are exposed to various environmental factors that can damage them over time. Protecting your cable from direct sunlight, extreme temperatures, and moisture is essential to prevent this.
If your cable is exposed to direct sunlight, consider installing a shade or cover to protect it. You can also wrap the cable with a material designed for outdoor use. Additionally, ensure the cable is not in contact with any moisture, and if necessary, consider using a waterproof sealant.
2. Regular Maintenance
Regular maintenance on your outside internet cable can help identify and prevent potential issues. Inspect the cable for any signs of damage, such as cuts, breaks, or exposed wires, and fix them as soon as possible. Additionally, inspect any connectors or attachments for corrosion or other signs of wear and replace them if necessary.
3. Power Surges
Power surges can also cause damage to your outside internet cable. Consider using a surge protector or uninterruptible power supply (UPS) on your modem or router to protect it from power surges. These devices can help regulate the flow of electricity and prevent damage to your equipment.
4. Professional Inspection
If you’re experiencing ongoing connection problems or notice any signs of damage on your outside internet cable, consider hiring a professional for inspection. A technician can identify any underlying issues and provide the necessary repairs to ensure a reliable connection.
These tips can maintain a smooth outdoor internet connection and prevent future issues. Regular maintenance and protection of your outside internet cable can ensure a consistent and reliable internet experience for you and your household.
Conclusion
In conclusion, fixing outside internet cable issues can seem daunting, but it doesn’t have to be. Following the steps and tips outlined in this guide, you can troubleshoot, repair, and maintain your outdoor internet cable and ensure a reliable internet connection for years.
Remember, before attempting any repairs, it’s essential to identify the cause of the problem by following the troubleshooting steps. You can proceed with the necessary repairs from there using the appropriate techniques.
If you’re a DIY enthusiast, you can handle many repairs independently but don’t hesitate to call a professional if you’re not confident in your abilities.
Finally, maintaining a smooth outdoor internet connection requires ongoing effort. Follow the tips provided in this guide to protect your cable from environmental factors and prevent future issues.
Following these steps and staying informed, you can fix and maintain your outdoor internet cable and enjoy uninterrupted internet access. Now that you know how to fix your outside internet cable, you can rest assured that you’ll be able to tackle any issues that might arise confidently.
FAQ
How do I fix my outside internet cable?
To fix your outside internet cable, follow these steps:
1. Identify the issue by troubleshooting any connectivity problems.
2. If there is physical damage, such as a cut or break in the cable, assess the extent of the damage.
3. If the damage is minor, use waterproof tape or heat shrink tubing to seal the damaged area.
4. For more extensive damage, you may need to use connectors to splice the cable by joining the cut ends.
5. After repairing the cable, test your internet connection to ensure it works correctly.
How do I troubleshoot outdoor internet cable?
If you’re experiencing issues with your outdoor internet cable, follow these troubleshooting steps:
1. Check all connections to ensure they are securely plugged in.
2. Restart your modem and router.
3. Test the cable by connecting a different device to it.
4. If the problem persists, try using a different cable to rule out any issues with the cable itself.
5. Contact your internet service provider for further assistance if the problem continues.
How can I repair my outdoor internet cable?
To repair your outdoor internet cable, follow these steps:
1. Inspect the cable for visible damage, such as cuts or breaks.
2. If you find a cut or break, use a sharp knife or cable cutter to remove the damaged portion.
3. Strip the insulation from the cable ends to expose the inner wires.
4. Connect the corresponding wires using waterproof connectors or crimping them together.
5. Seal the repaired area with waterproof tape or heat shrink tubing to protect it from moisture.
Can I repair my outside internet cable myself?
Yes, you can repair your outside internet cable yourself. However, it is important to have the necessary tools and knowledge to handle the repairs safely and effectively. Follow our DIY outside internet cable repair guide for detailed instructions and tips to ensure successful repairs.
What are standard troubleshooting techniques for outdoor Ethernet cables?
When troubleshooting outdoor Ethernet cables, try the following techniques:
1. Check the connections to ensure they are securely plugged in.
2. Restart your modem and router.
3. Verify that the Ethernet cable is compatible with your devices.
4. Test the cable by connecting a different device to it.
5. Update the drivers for your network adapters if necessary.
How do I repair an underground internet cable?
Repairing an underground internet cable requires a different approach. Follow these steps:
1. Use a cable locator or hire a professional to locate the underground cable.
2. Dig carefully around the damaged area, exposing the cable while avoiding further damage.
3. Repair the damaged portion of the cable using waterproof connectors and sealing materials.
4. Rebury the cable and ensure it is securely covered to protect it from environmental factors.
How can I fix outdoor network cable issues?
To fix outdoor network cable issues, follow these steps:
1. Inspect the cable for visible damage, such as cuts or breaks.
2. If there is physical damage, repair it using waterproof connectors or splicing techniques.
3. Check the connectors for any signs of damage or corrosion and replace them if necessary.
4. Test the cable by connecting a different device to it.
5. Ensure proper wiring and connections between devices for a reliable network connection.
How can I fix an internet cable buried in the ground?
If your internet cable is buried in the ground and needs fixing, follow these steps:
1. Use a cable locator or hire a professional to locate the buried cable.
2. Depending on the damage, you may need to dig carefully around the area to access the cable.
3. Repair any cuts, breaks, or loose connections using waterproof connectors or splicing techniques.
4. Ensure the repaired cable is properly covered and protected before burying it again.
How can I solve less common outdoor internet cable issues?
To solve less common outdoor internet cable issues, try the following problem-solving strategies:
1. Reset your modem and router.
2. Update the firmware of your networking devices.
3. Adjust the Wi-Fi channel to optimize performance.
4. Check for any interference from other devices or nearby structures.
5. Consult online forums or contact your internet service provider for further assistance.
How can I maintain a smooth outdoor internet connection?
To maintain a smooth outdoor internet connection, consider these tips:
1. Protect your outdoor cable from harsh weather conditions using weatherproofing techniques.
2. Regularly inspect the cable for any signs of damage and repair them promptly.
3. Clean the connectors to prevent dust or debris from affecting the signal quality.
4. Keep the cable away from sharp objects or areas that may be accidentally cut or damaged.
5. Follow best practices for network security to ensure a secure and reliable connection.